Red Hat Enterprise Linux is an Open Source Linux distribution developed by Red Hat company, which can run all major processor architectures. Unlike other Linux distributions which are free to download, install and use, RHEL can be downloaded and used, with the exception the 30-day evaluation version, only if you buy a subscription.
In this tutorial will take a look on how you can install the latest release of RHEL 7.3, on your machine using the 30-day evaluation version of the ISO image downloaded from Red Hat Customer Portal athttps://access.redhat.com/downloads.
If you’re looking for CentOS, go through our CentOS 7.3 Installation Guide.
To review what’s new in RHEL 7.3 release please read the version release notes.
Pre-Requirements
This installation will be performed on a UEFI virtualized firmware machine. To perform the installation of RHELon a UEFI machine first you need to instruct the EFI firmware of your motherboard to modify the Boot Ordermenu in order to boot the ISO media from the appropriate drive (DVD or USB stick).
If the installation is done through a bootable USB media, you need to assure that the bootable USB is created using a UEFI compatible tool, such as Rufus, which can partition your USB drive with a valid GPT partition scheme required by UEFI firmware.
To modify the motherboard UEFI firmware settings you need to press a special key during your machine initialization POST (Power on Self Test).
The proper special key needed for this configuration can be obtained by consulting your motherboard vendor manual. Usually, these keys can be F2, F9, F10, F11 or F12 or a combination of Fn with these keys in case your device is a Laptop.
Besides modifying UEFI Boot Order you need to make sure that QuickBoot/FastBoot and Secure Boot options are disabled in order to properly run RHEL from EFI firmware.
Some UEFI firmware motherboard models contain an option which allows you to perform the installation of an Operating System from Legacy BIOS or EFI CSM (Compatibility Support Module), a module of the firmware which emulates a BIOS environment. Using this type of installation requires the bootable USB drive to be partitioned in MBR scheme, not GPT style.
Also, once you install RHEL, or any other OS for that matter, on your UEFI machine from one of these two modes, the OS must run on the same firmware you’ve performed the installation.
You can’t switch from UEFI to BIOS Legacy or vice-versa. Switching between UEFI and Bios Legacy will render your OS unusable, unable to boot and the OS will require reinstallation.
Installation Guide of RHEL 7.3
1. First, download and burn RHEL 7.3 ISO image on a DVD or create a bootable USB stick using the correct utility.
Power-on the machine, place the DVD/USB stick in the appropriate drive and instruct UEFI/BIOS, by pressing a special boot key, to boot from the appropriate installation media.
Once the installation media is detected it will boot-up in RHEL grub menu. From here select Install red hatEnterprise Linux 7.3 and press [Enter] key to continue.

RHEL 7.3 Boot Menu
2. The next screen appearing will take you to the welcome screen of RHEL 7.3 From here chose the language that will be used for the installation process and press [Enter] key to move on to the next screen.

Select RHEL 7.3 Language
3. The next screen that will appear contains a summary of all the items you will need to setup for the installation of RHEL. First hit on DATE & TIME item and choose the physical location of your device from the map.
Hit on the upper Done button to save the configuration and proceed further with configuring the system.
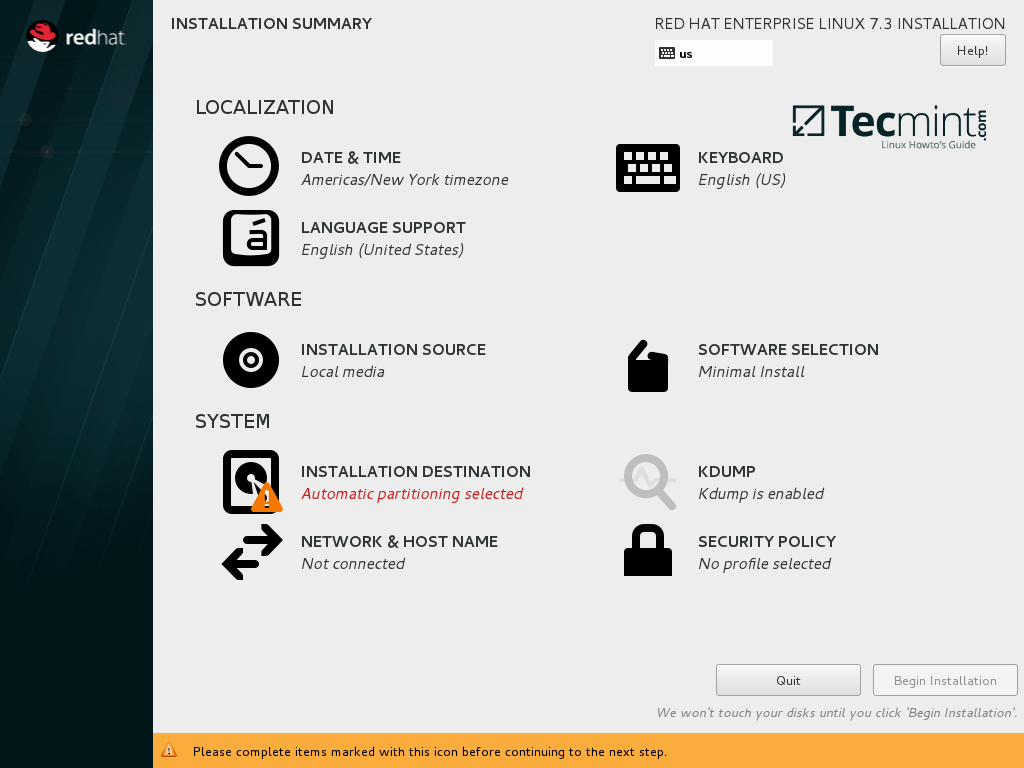
RHEL 7.3 Installation Summary

Select RHEL 7.3 Date and Time
4. On the next step, configure your system keyboard layout and the and hit on Done button again to go back to the main installer menu.
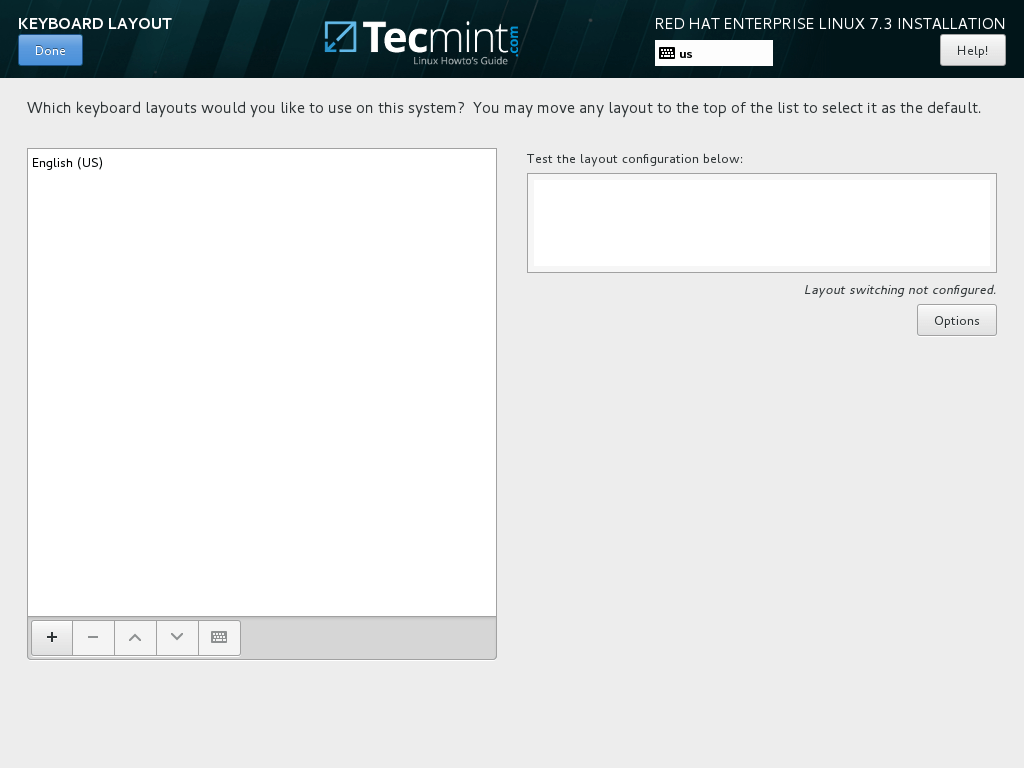
Configure Keyboard Layout
5. Next, select the language support for your system and hit Done button to move to the next step.
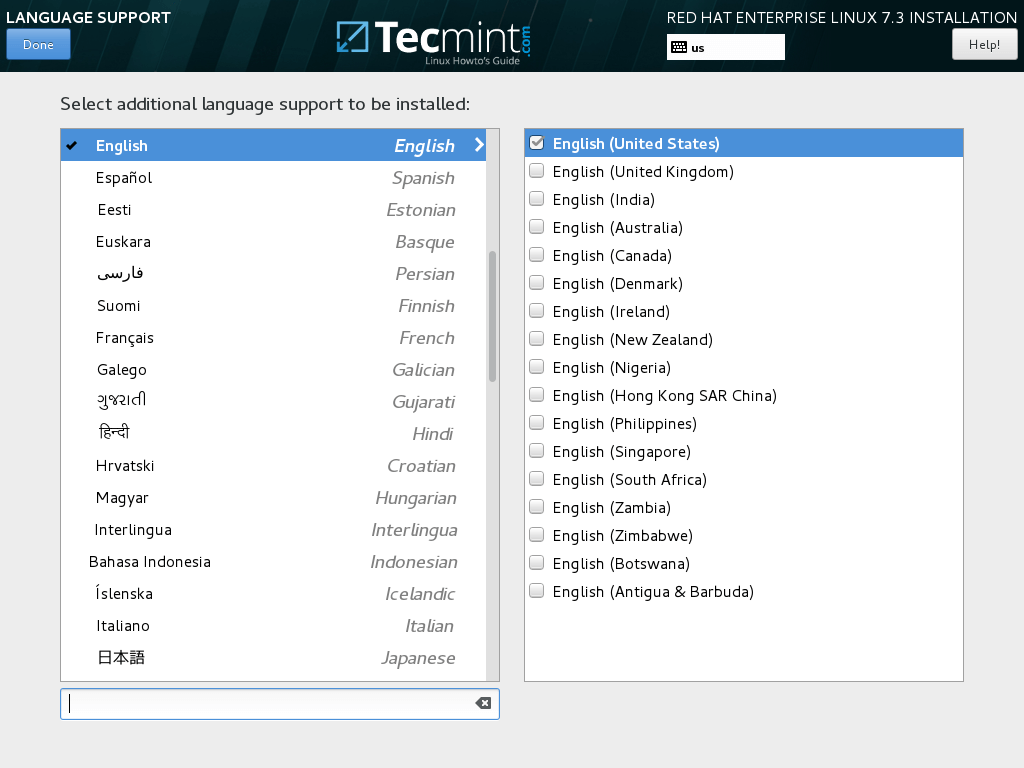
Choose Language Support
6. Leave the Installation Source item as default because in this case we’re performing the installation from our local media drive (DVD/USB image) and click on Software Selection item.
From here you can choose the base environment and Add-ons for your RHEL OS. Because RHEL is a Linux distribution inclined to be used mostly for servers, the Minimal Installation item is the perfect choice for a system administrator.
This type of installation is the most recommended in a production environment because only the minimal software required to properly run the OS will be installed.
This also means a high degree of security and flexibility and a small size footprint on your machine hard drive. All other environments and add-ons listed here can be easily installed afterwards from command line by buying a subscription or by using the DVD image as a source.
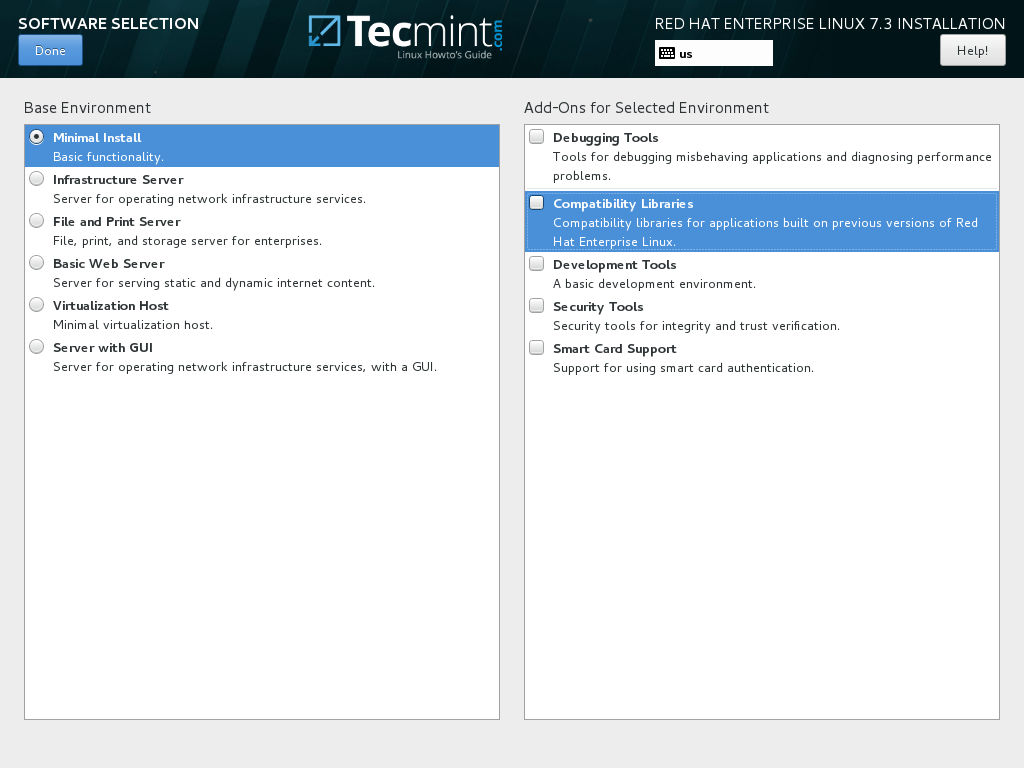
RHEL 7.3 Software Selection
7. In case you want to install one of the pre-configured server base environments, such as Web Server, File and Print Server, Infrastructure Server, Virtualization Host or Server with a Graphical User Interface, just check the preferred item, choose Add-ons from the right plane and hit on Done button finish this step.

Select Server with GUI on RHEL 7.3
8. On the next step hit on Installation Destination item in order to select the device drive where the required partitions, file system and mount points will be created for your system.
The safest method would be to let the installer automatically configure hard disk partitions. This option will create all basic partitions required for a Linux system (
/boot, /boot/efi and /(root) and swap inLVM), formatted with the default RHEL 7.3 file system, XFS.
Keep in mind that if the installation process was started and performed from UEFI firmware, the partition table of the hard disk would be GPT style. Otherwise, if you boot from CSM or BIOS legacy, the hard drive partition table would be old MBR scheme.
If you’re not satisfied with automatic partitioning you can choose to configure your hard disk partition table and manually create your custom required partitions.
Anyway, in this tutorial we recommend that you choose to automatically configure partitioning and hit on Donebutton to move on.
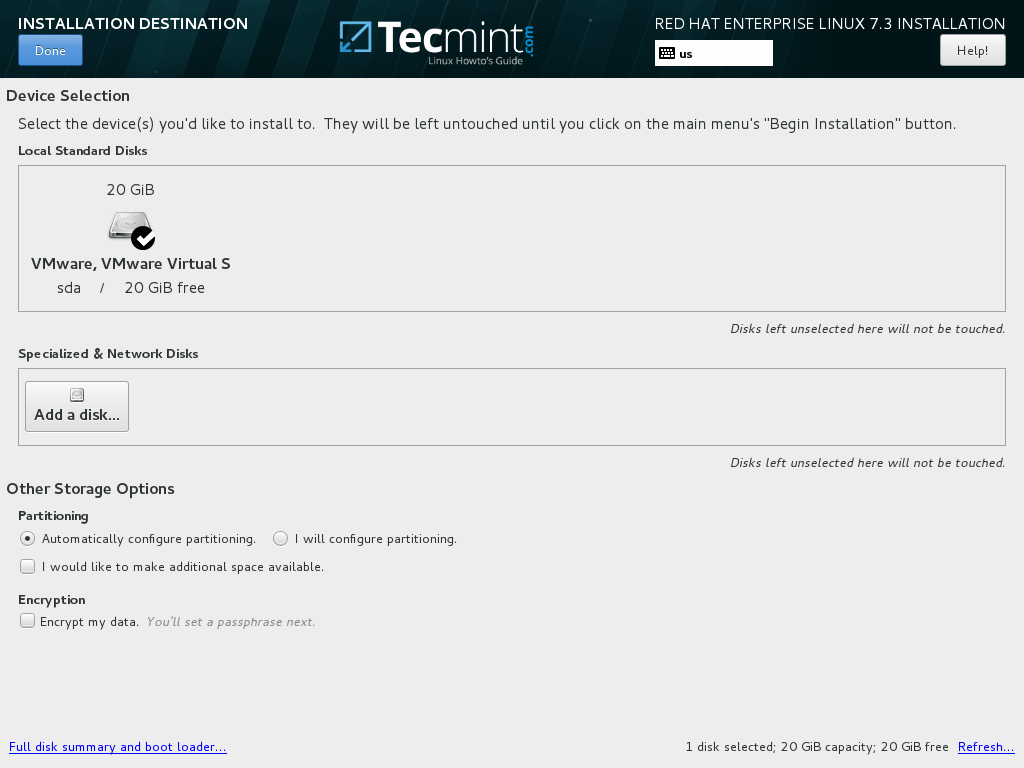
Choose RHEL 7.3 Installation Drive
9. Next, disable Kdump service and move to network configuration item.

Disable Kdump Feature
10. In Network and Hostname item, setup and apply your machine host name using a descriptive name and enable the network interface by dragging the Ethernet switch button to
ON position.
The network IP settings will be automatically pulled and applied in case you have a DHCP server in your network.

Configure Network Hostname
11. To statically setup the network interface click on the Configure button and manually configure the IPsettings as illustrated on the below screenshot.
When you finish setting-up the network interface IP addresses, hit on Save button, then turn
OFF and ON the network interface in order to apply changes.
Finally, click on Done button to return to the main installation screen.
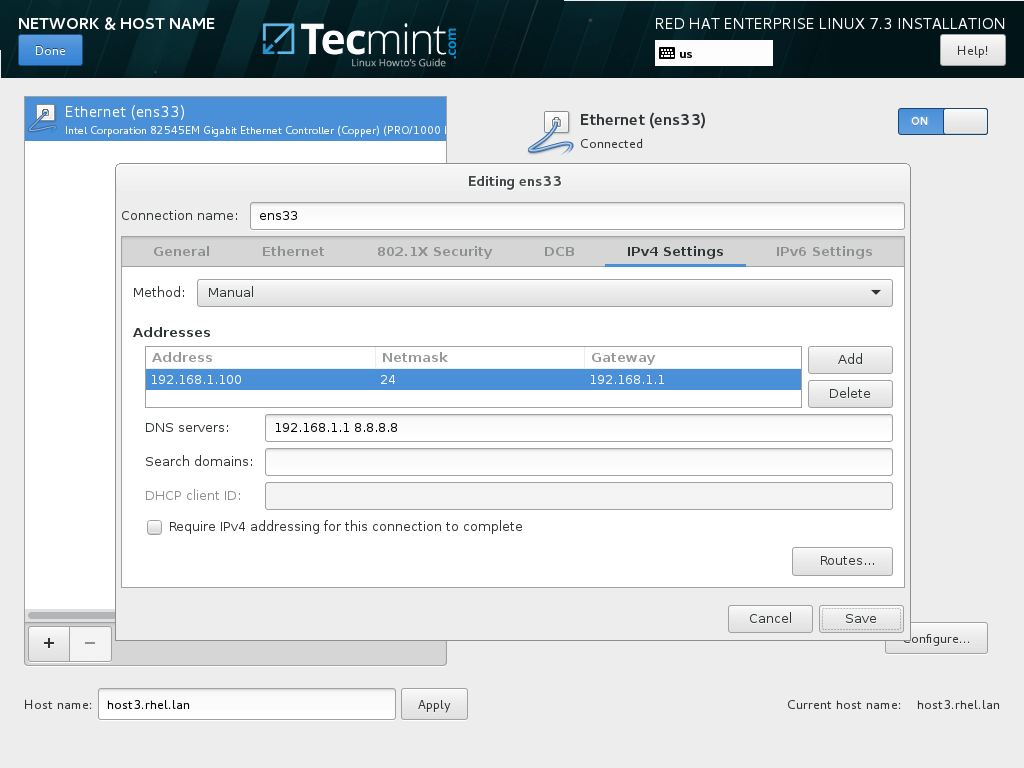
Configure Network IP Address
12. Finally, the last item you need to configure from this menu is a Security Policy profile. Select and apply theDefault security policy and hit on Done to go back to the main menu.
Review all your installation items and hit on Begin Installation button in order to start the installation process. Once the installation process has been started you cannot revert changes.

Apply Security Policy for RHEL 7.3

Begin Installation of RHEL 7.3
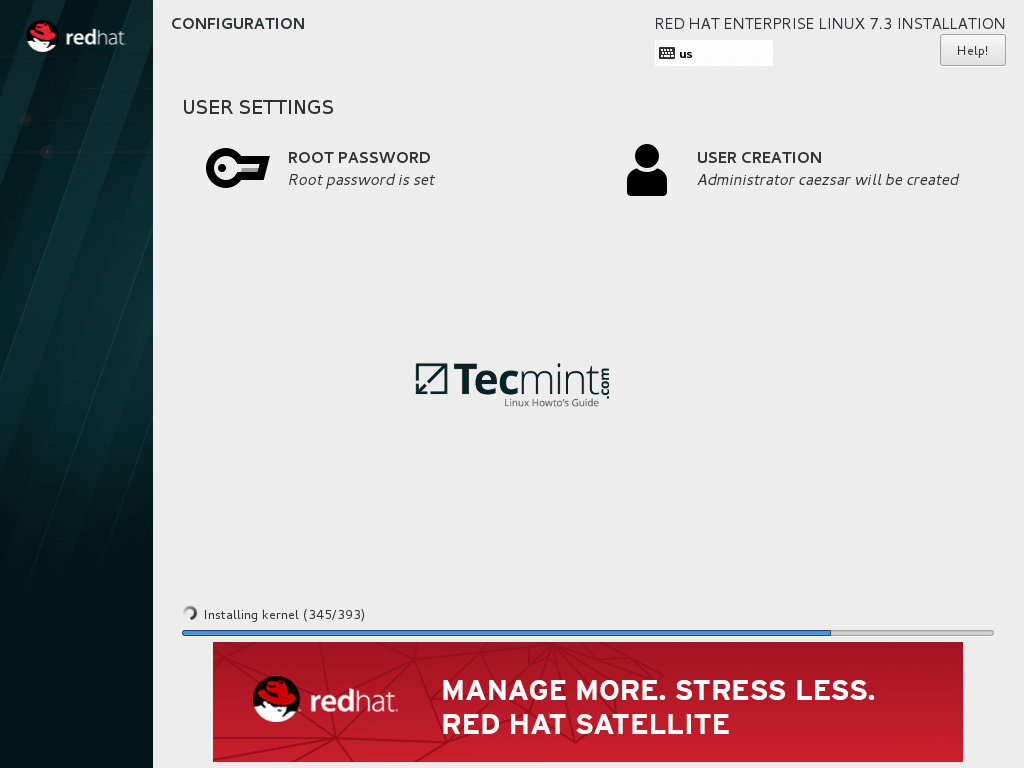
13. During the installation process the User Settings screen will appear on your monitor. First, hit on Root Password item and choose a strong password for the root account.

Configure User Settings
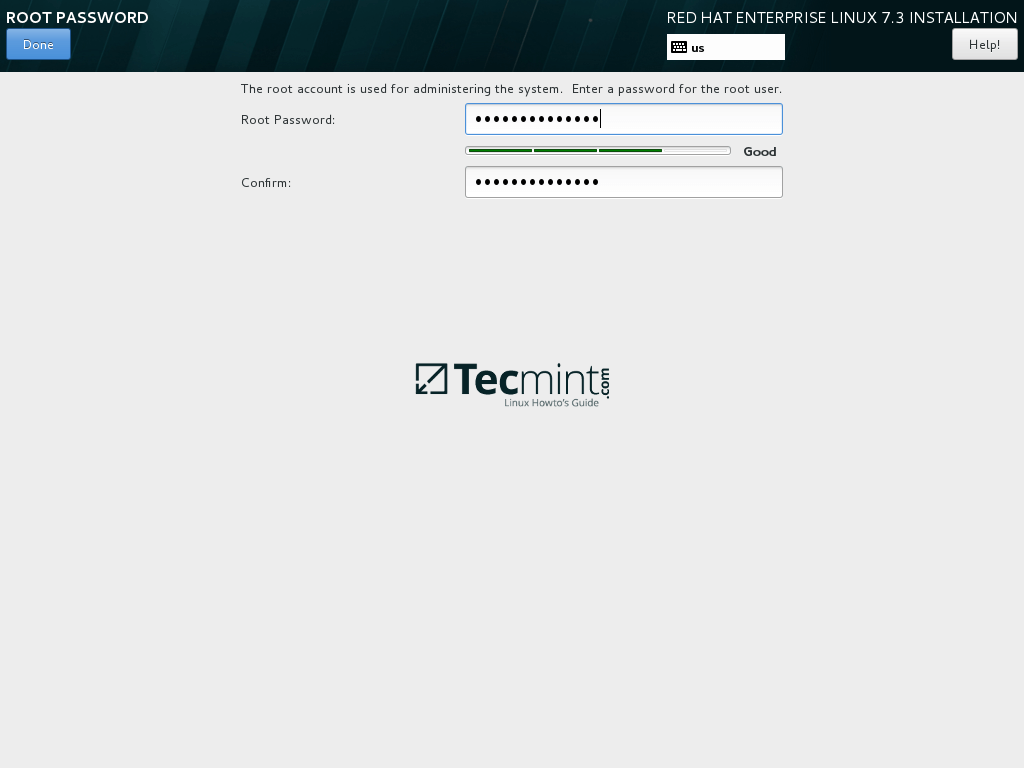
Set Root Account Password
14. Finally, create a new user and grant the user with root privileges by checking Make this user administrator. Choose a strong password for this user, hit on Done button to return to the User Settings menu and wait for the installation process to finish.

Create New User Account
RHEL 7.3 Installation Process
15. After the installation process finishes with success, eject the DVD/USB key from the appropriate drive andreboot the machine.
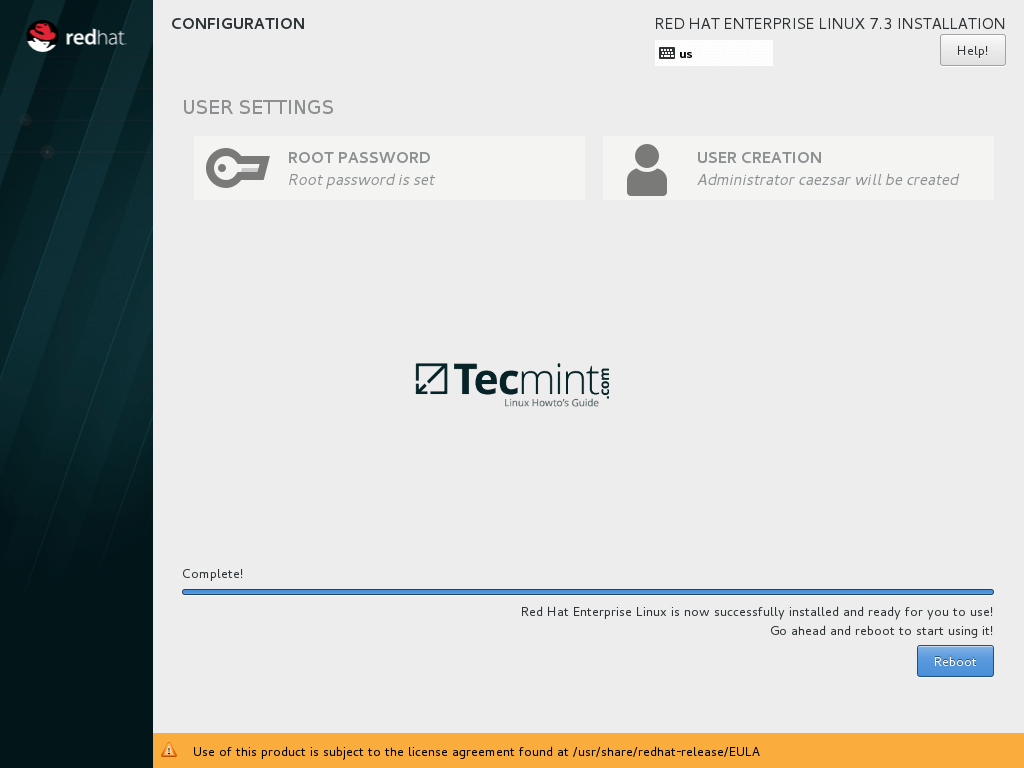
RHEL 7.3 Installation Complete

ReplyDeleteAyo Gabung bersama kami di DOMINO206(.)net
Jangan Menunda Kemenangan Bermain Anda ! Segera Daftarkan User ID nya & Mainkan Kartu Bagusnya.
Kami hadirkan permainan Terbaik dari DOMINO206 permainan
dalam website
Pusat Game Domino ONline Terpercaya Se-Asia
Hanya cukup menggunakan 1ID saja anda sudah bisa menikmati 8 game Populer
Tunggu apa lagi silahkan Registrasi diri anda bersama kami.
Dan nikmati kembali BONUS REFFERAL terbesar 15% untuk anda.
Untuk lebih informasi lebih lanjut kalian bisa langsung berdikskusi
langsung dengan CS handal.
MInimal Deposit 20rb
Minimal Witdraw 20rb
BBM : 2BE3D683 / E3EE3B63
WA : (+85587480626)
LINE : DOMINO206
IG : domino_206
Link Alternatif
WWW . DOMINOPELANGI . NET
WWW . DOMINOPELANGI . COM
WWW . PELANGIDOMINO . NET
Bank: BNI, BCA, BRI, MANDIRI dan DANAMON
Pusat Game:Bandar66|BandarQ|AduQ|Bandarpoker|CapsaSusun|
Domino99|Poker|Bandarsakong|
$$$$ DOMINO206.NET $$$$
#Poker
#AduQ
#BandarPoker
#BandarQ
#CapsaSusun
#Domino99
#Sakong
#Bandar66
#DPMinim
#WDBesar